

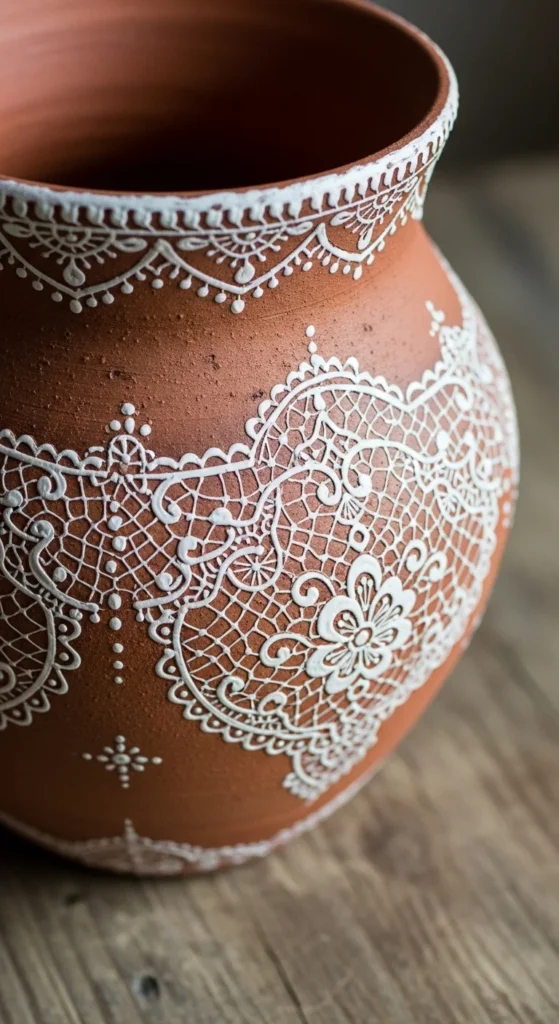
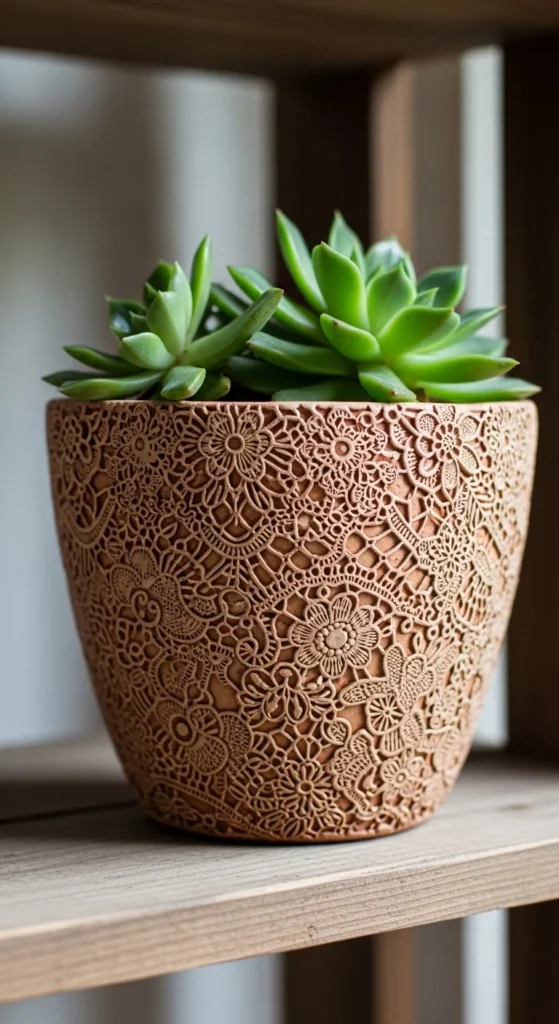
Decorating clay pots with intricate lace patterns can transform a simple piece of pottery into an elegant work of art. Whether you’re adding a personal touch to your garden or creating unique gifts, lace patterns bring a touch of sophistication and charm. The good news? You don’t need to be an expert artist to achieve this beautiful look. With the right materials and a bit of creativity, you can make your clay pots stand out.
In this step-by-step guide, we’ll walk you through the process of decorating your clay pots with lovely lace patterns, giving them a stylish and timeless appeal.
Materials You’ll Need
Before you get started, gather the necessary materials. This project is straightforward and doesn’t require many tools. Here’s what you’ll need:
- Clay pot (terracotta or any preferred material)
- Lace fabric (you can choose a lace table runner, lace trim, or fabric lace)
- Acrylic paint (white or a contrasting color for the lace effect)
- Sponge or paintbrush
- Mod Podge or decoupage glue
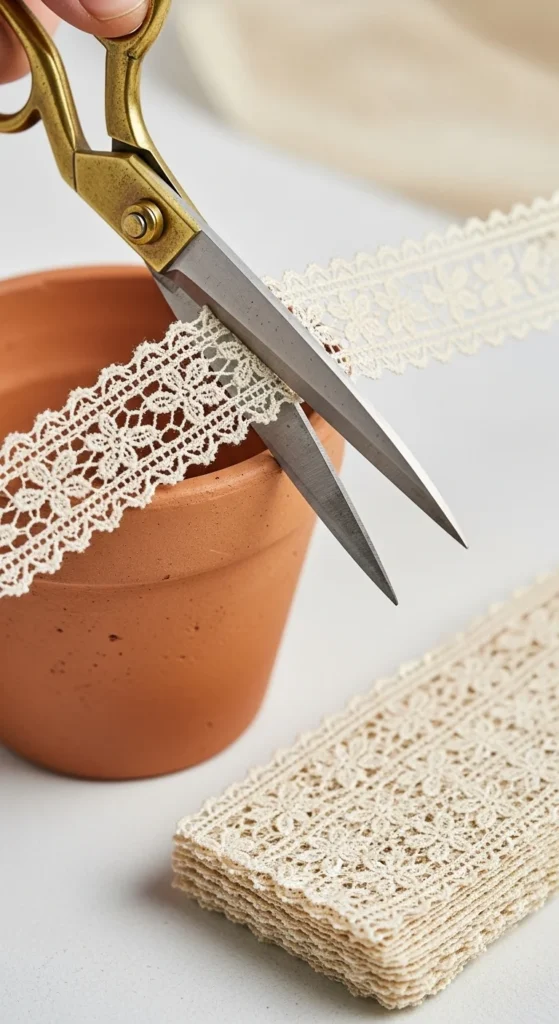
- Scissors
- Masking tape (optional, for neat edges)
- Ruler (if you want precise measurements)
Step 1: Clean the Clay Pot
Start by cleaning the clay pot. Dust and dirt can affect the adhesive and paint, so use a damp cloth to wipe down the surface. Let the pot dry completely before proceeding.
Step 2: Prepare the Lace Fabric
Take the lace fabric and cut it to fit the desired area of the pot. You can either cover the entire surface of the pot with lace or focus on specific areas such as the top or bottom rims. If you’re new to this craft, start with a simple lace design around the top rim to keep it manageable.
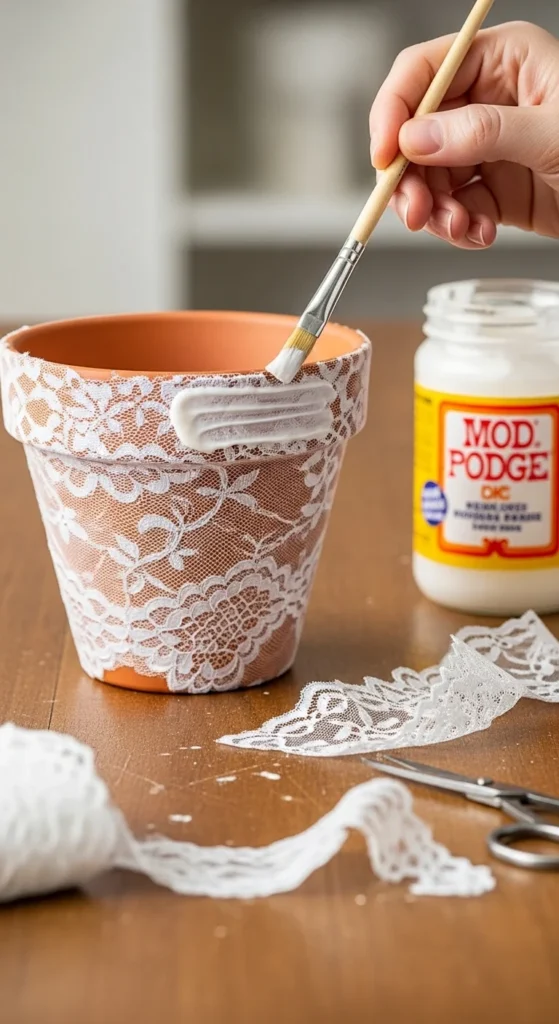
Step 3: Apply a Layer of Mod Podge
Now it’s time to apply the lace to the pot. Take your Mod Podge (or decoupage glue) and brush a thin, even layer over the area of the pot where you’ll be placing the lace. Be careful not to apply too much, as excess glue can make the lace fabric stiff.
Carefully place the lace fabric on the glued surface. Press it down gently, smoothing out any wrinkles or air bubbles. You may need to trim the lace to ensure it fits perfectly, especially if you are working around curved areas.
Step 4: Paint the Lace Pattern
This is where the magic happens! Once the lace is applied and the glue has dried, you’ll want to paint over it to create a lace pattern. Use a contrasting acrylic paint, such as white if you’re working with a dark pot, or black if your pot is light.
Apply the paint over the lace with a sponge or a small paintbrush. Make sure to cover the lace completely, but do so gently to avoid lifting the lace. If you want a more textured effect, use a sponge to dab the paint on lightly.
Allow the paint to dry completely before moving on to the next step.
Step 5: Remove the Lace Fabric
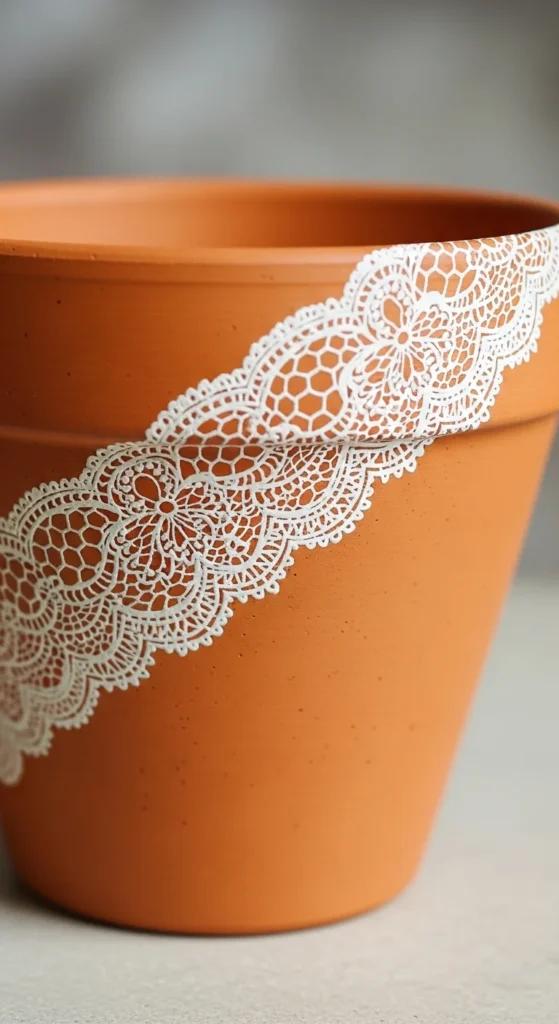
Once your paint has dried, carefully peel away the lace fabric. You’ll be left with a beautiful lace design on the pot. If any paint has bled through the lace, you can touch it up with a small paintbrush.
At this point, you can add additional layers of paint or a clear acrylic sealant to protect the design and give it a smooth finish.
Step 6: Final Touches
If you’d like to add extra decoration, consider painting the rim of the pot or adding some decorative details, such as dots or small floral designs. You could also use a gold or silver metallic paint to add some sparkle to the lace.
Conclusion: Add Your Personal Touch!
Now that you know how to decorate clay pots with elegant lace patterns, it’s time to get creative! You can experiment with different lace designs, colors, and pot sizes to create unique and stunning pieces for your home or garden. Whether it’s a small flower pot, a decorative centerpiece, or a personalized gift, your lace-decorated clay pots will surely impress.
So, grab your materials, follow these simple steps, and start decorating today. Don’t forget to save this guide for later—your future pots will thank you!
Happy crafting!

Leave a Reply