

Transforming ordinary clay pots into dazzling décor pieces is easier than you think! Whether you’re sprucing up your garden, adding charm to your patio, or creating a sparkling centerpiece for your home, glitter accents can give your pots that extra wow factor. Even if you’ve never painted a pot before, this guide will walk you step by step through a fun, creative process that feels satisfying from start to finish.
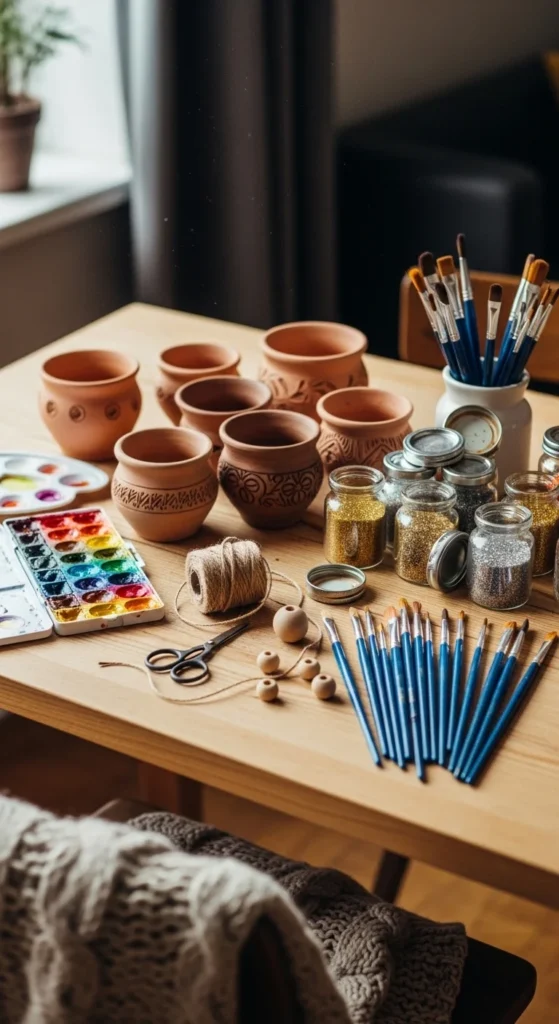
Materials You’ll Need
Before you dive in, gather your supplies. Having everything at hand makes the process smooth and enjoyable. Here’s a simple list:
- Plain clay pots (any size)
- Acrylic paint (choose your favorite base colors)
- Paintbrushes (small and medium)
- Mod Podge or clear-drying craft glue
- Fine glitter in colors of your choice
- Painter’s tape (for clean edges)
- Small container for shaking excess glitter
Tips:
- Pick a variety of glitter textures (fine, chunky, metallic) for a more dynamic look.
- If your pots are for outdoor use, choose waterproof acrylic paint and a weather-resistant sealer.

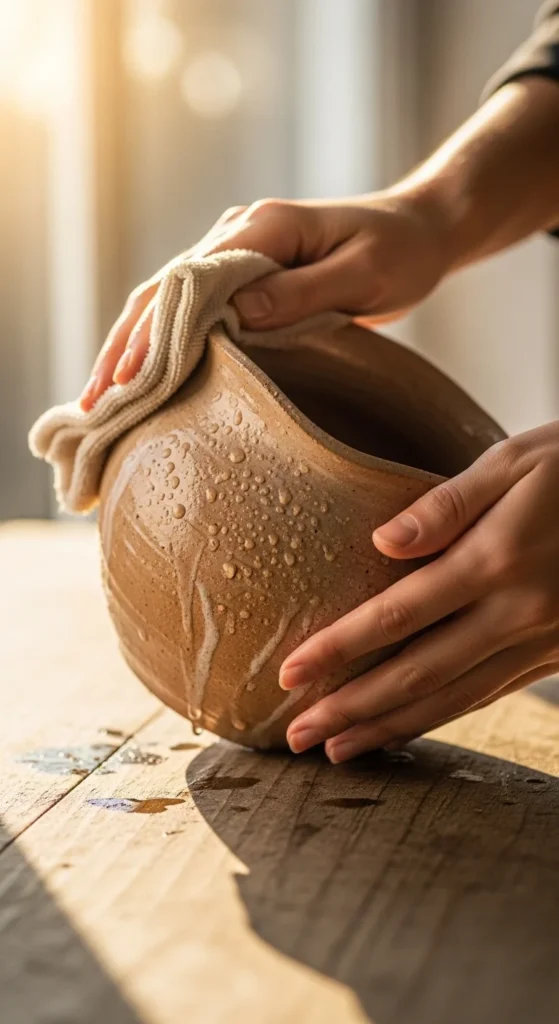
Step 1: Prepare Your Clay Pots
Clean your pots before starting. Dust, dirt, or oils from your hands can prevent paint and glue from sticking properly.
- Wash pots with warm soapy water and rinse thoroughly.
- Let them dry completely.
- If desired, lightly sand the surface for a smoother finish—this helps glitter adhere better.
Pro tip: Use painter’s tape to create stripes, chevrons, or geometric patterns. It will give your glitter a professional, clean edge.
Step 2: Apply a Base Coat of Paint
Adding a base coat helps your glitter pop and gives the pot a polished look.
- Choose a color that complements your glitter. For example, white or black makes metallic glitter shine, while pastel shades give a soft, whimsical effect.
- Use a medium brush for smooth coverage. Apply one or two coats, allowing each coat to dry fully.
Quick tip: Don’t rush the drying process—wet paint can smudge your glitter and make your design look messy.
Step 3: Add Your Sparkly Glitter Accents
Now comes the fun part—glitter!
- Brush a thin layer of Mod Podge or clear-drying glue onto the areas you want to sparkle.
- Sprinkle glitter evenly over the glued area. Tilt and gently tap the pot to remove excess glitter.
- Repeat for multiple colors or patterns, letting each section dry before adding more.
Design ideas:
- Glitter rim: Add sparkle only to the top edge of the pot.
- Ombré effect: Gradually blend glitter from dense at the top to sparse at the bottom.
- Geometric patterns: Use painter’s tape to create triangles, stripes, or diamonds before applying glitter.

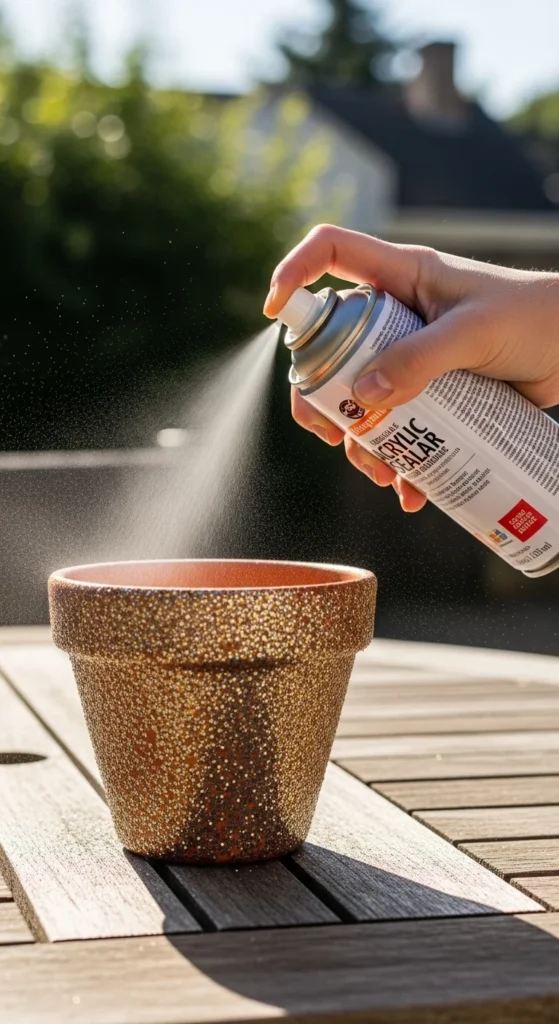
Step 4: Seal Your Glitter
To prevent glitter fallout and keep your pots looking fabulous, seal your design:
- Use a clear acrylic spray sealer or brush-on Mod Podge.
- Apply 1–2 thin coats, allowing each coat to dry completely.
- For outdoor pots, choose a waterproof, UV-resistant sealer to maintain sparkle through sun and rain.
Extra tip: If your pot will hold soil and plants, make sure the inside is sealed separately if you want waterproof protection.
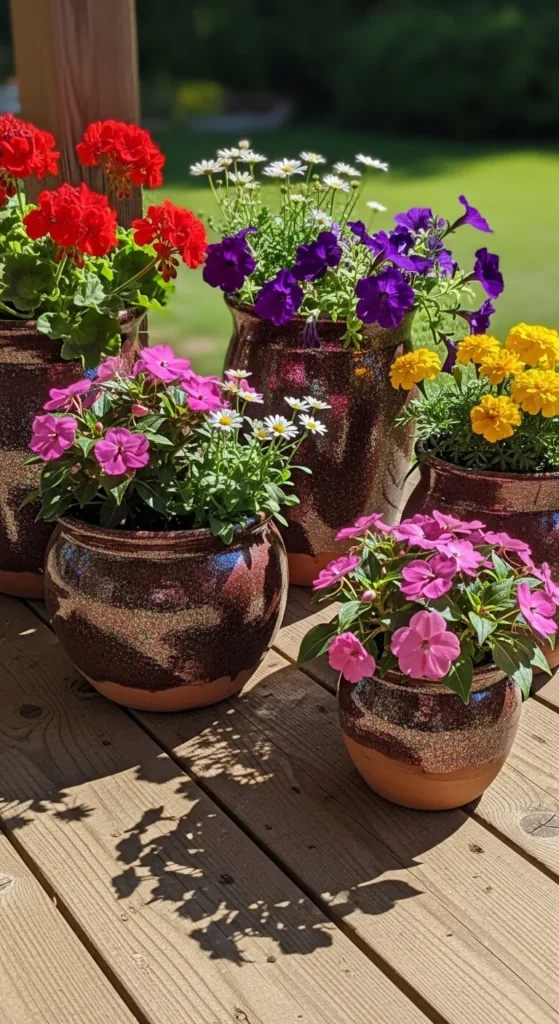
Step 5: Display Your Sparkly Pots
Your pots are ready to shine!
- Fill them with your favorite plants, flowers, or succulents.
- Arrange them in clusters for a stunning visual impact.
- Mix and match colors and glitter textures for a playful, Pinterest-worthy look.
Decor inspiration: Use glitter pots as table centerpieces, porch décor, or even as indoor planters to brighten up a room.
Final Thoughts
Decorating clay pots with glitter is a simple way to add personality and sparkle to your space. With a few basic supplies and some creativity, you can turn plain pots into dazzling décor pieces that will catch every eye.
Don’t forget—experiment with colors, textures, and patterns. Every pot can tell its own story, and your glittery creations are sure to inspire anyone who sees them.
Save this project idea for your next DIY day, and get ready to make your garden or home shine!

Leave a Reply