

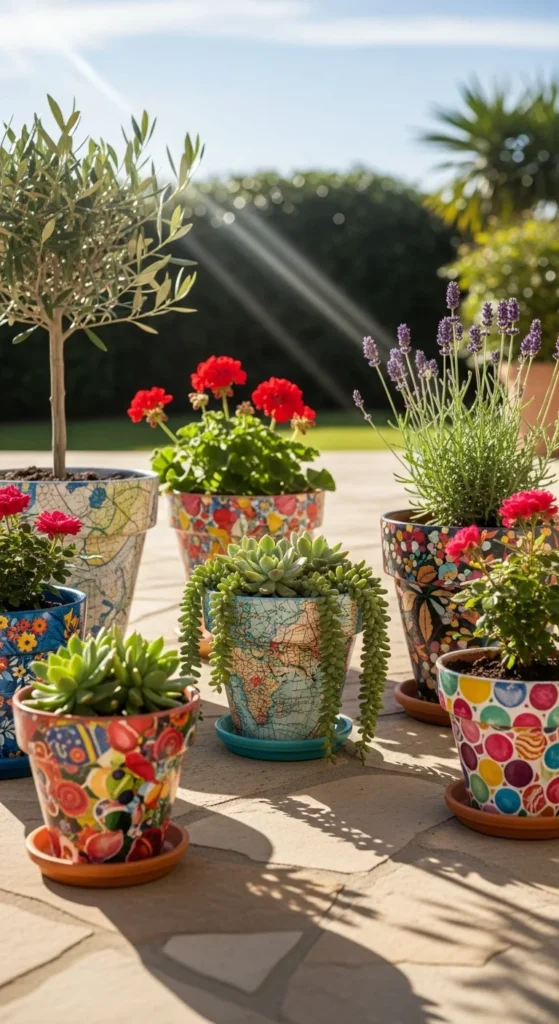
Every gardener knows that a simple clay pot can feel a little… plain. But what if I told you that with just a few basic supplies and a touch of creativity, you could transform a dull pot into a charming, one-of-a-kind piece of art? Decoupage is the perfect way to do this—easy, fun, and incredibly satisfying. Whether you want a cute floral design for your kitchen herbs or a vibrant pot for your patio plants, this guide will walk you through the process step by step.
What You’ll Need
Before we get started, let’s gather your materials. Having everything ready will make the process smooth and enjoyable. Here’s what you’ll need for a basic decoupage project:
- Plain clay pots (any size)
- Decorative paper or napkins (floral, geometric, or themed patterns)
- Decoupage glue or Mod Podge
- A small foam brush or paintbrush
- Scissors
- Clear acrylic sealer (optional, for outdoor use)
[Image Prompt] An overhead shot of all decoupage supplies neatly arranged on a bright, white table.
Preparing Your Clay Pot
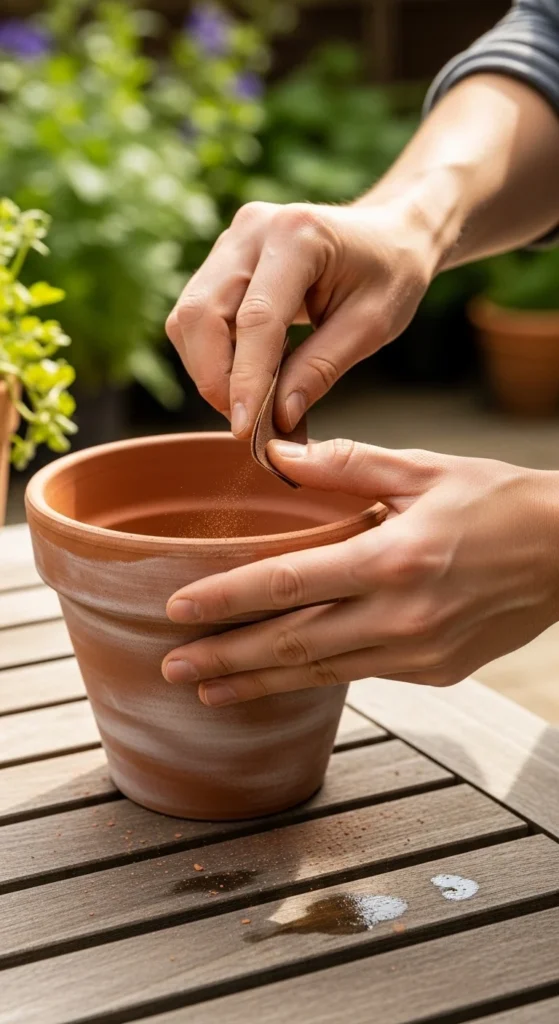
Preparation is key for a flawless finish. Start by cleaning your pot thoroughly to remove dust or dirt. This helps the glue adhere better and ensures your design looks crisp.
- Wash the pot with mild soap and water.
- Let it dry completely.
- Lightly sand any rough edges if your pot is unglazed—this will give your paper something to grip.
Pro Tip: If you’re using bright or very thin paper, consider painting the pot with a light base color first. It makes your design pop!
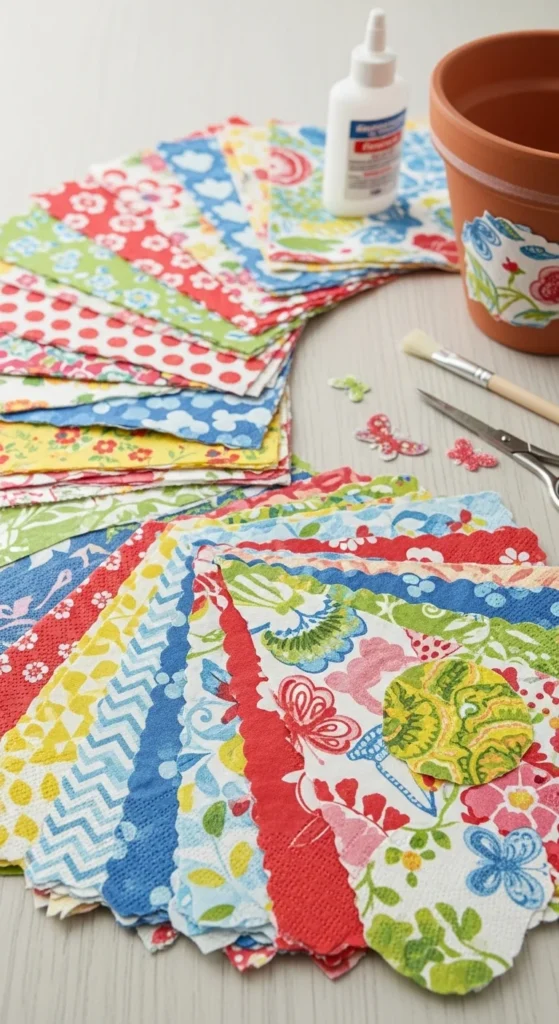
Cutting and Arranging Your Paper
Now comes the fun part—choosing your design! Decoupage is all about layering paper to create texture and interest.
- Cut your paper into shapes or strips that fit the surface of your pot. You can do squares, triangles, or irregular pieces for a mosaic effect.
- Lay out your pieces on the pot without glue first. This allows you to experiment with placement.
Tip: Mixing patterns or layering semi-transparent napkins can add depth and dimension. Don’t be afraid to play with colors!
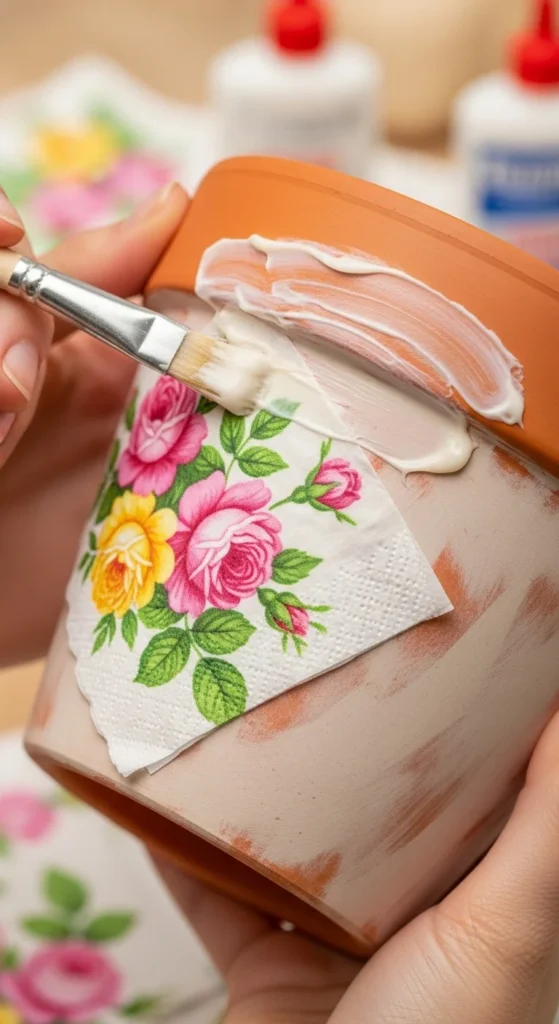
Gluing and Smoothing
Here’s where your pot really starts to come alive.
- Using your brush, apply a thin layer of decoupage glue to a small section of the pot.
- Carefully place your paper piece on top.
- Smooth out any bubbles or wrinkles gently with your fingers or a dry brush.
- Continue until the entire surface is covered.
Remember: It’s better to work in sections than try to cover the pot all at once. Once everything is glued, apply a thin layer of decoupage glue over the top to seal your design.
Pro Tip: For an extra-smooth finish, let the first coat dry completely before adding a second coat of glue.
Finishing Touches
Once your pot is fully decoupaged and dry, you can add extra protection if you plan to use it outdoors.
- Spray or brush on a clear acrylic sealer to make it weather-resistant.
- Add embellishments like ribbons, twine, or small charms around the rim for a personalized touch.
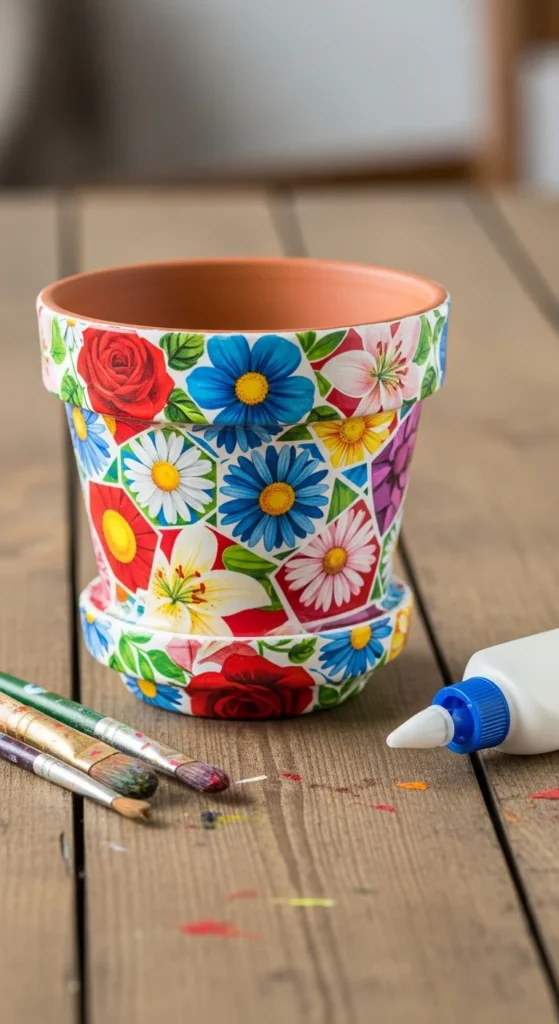
Your clay pot is now ready to show off! Fill it with herbs, succulents, or your favorite flowers and admire your handiwork.
Tips for Success
- Work with one small area at a time to avoid messy glue smears.
- Don’t rush drying times—patience yields a cleaner finish.
- Reuse leftover scraps to create mini accent pots.
Decorating clay pots with decoupage is more than just a craft—it’s a way to express your creativity and add a splash of personality to your plants. With just a little glue, paper, and imagination, you can turn plain pots into statement pieces for your home or garden.
Save this guide and give it a try this weekend—you might discover a new favorite hobby!

Leave a Reply