

There’s something undeniably charming about a plant peeking out of a pot with personality. Transforming ordinary clay pots into cute face planters is a fun, creative project that brings a little whimsy to your home or garden. Whether you’re a seasoned crafter or just looking for a weekend DIY, this guide will walk you through the process step by step.
What You’ll Need
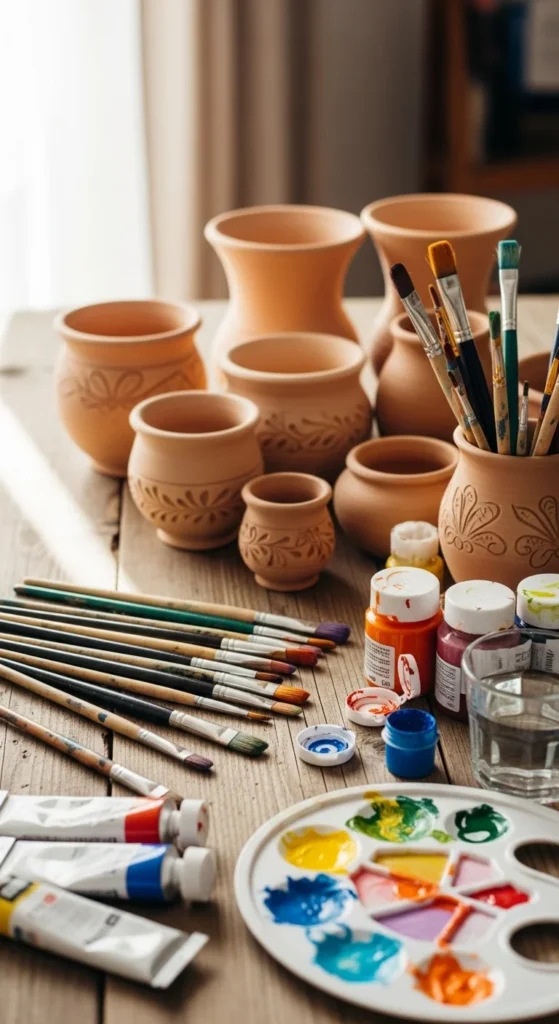
Before diving in, gather all your supplies. Here’s a handy list to get you started:
- Plain clay pots (various sizes)
- Acrylic paints in your favorite colors
- Fine-tipped paintbrushes for details
- Permanent markers (optional)
- Clear acrylic sealer
- Potting soil
- Small plants or succulents
- Pencil for sketching faces
Step 1: Prep Your Pots
Start by cleaning your clay pots. Wipe away any dust or dirt, so your paint adheres smoothly. If your pots are new, rinsing and letting them dry completely works perfectly.
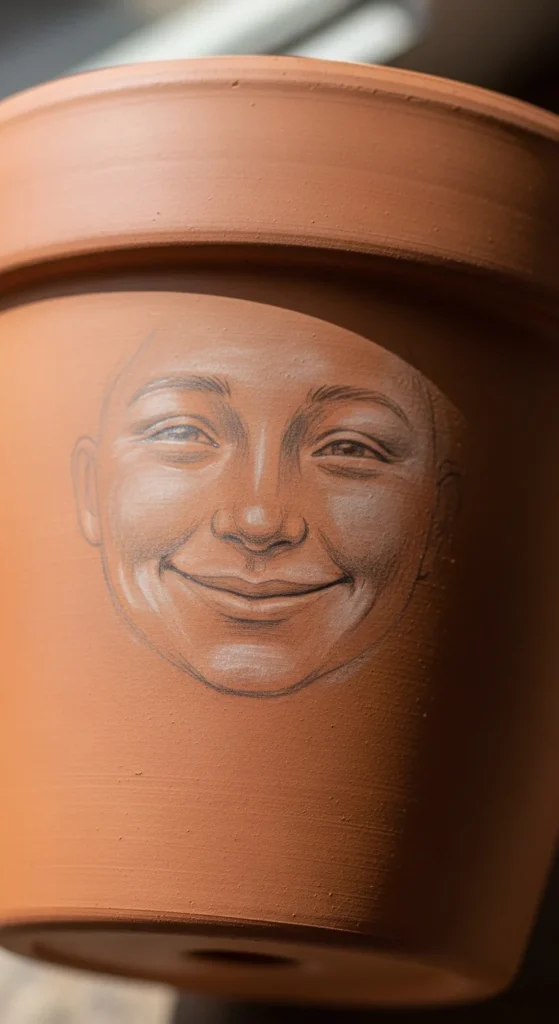
Next, decide on the size and type of face you want. Are you thinking cute and minimalist, silly and cartoonish, or elegant and whimsical? Sketch lightly with a pencil to guide your painting.
Tip: Round pots often work best for simple face designs, while taller pots are perfect for elongated, whimsical expressions.
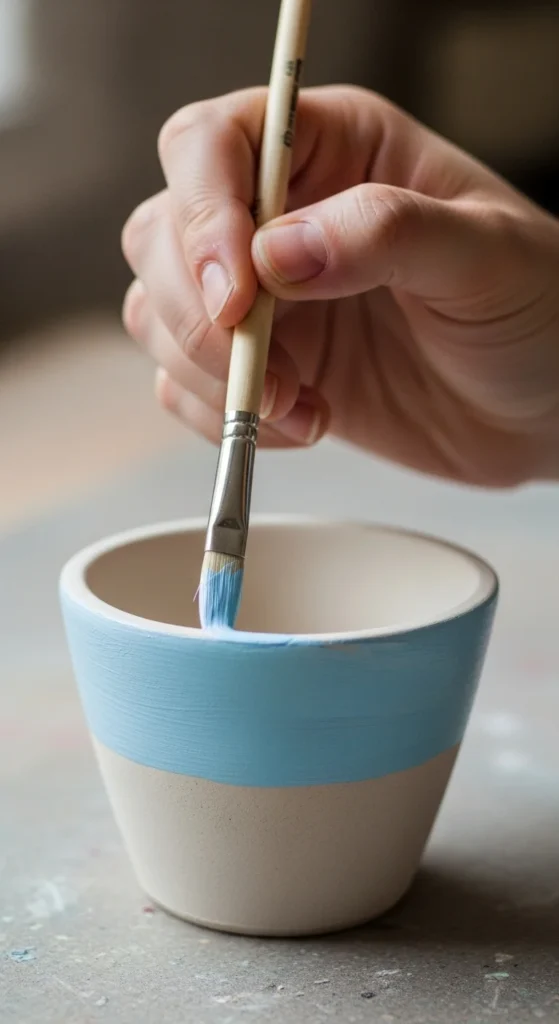
Step 2: Painting the Base
Apply a base coat if desired. This is optional, but painting the entire pot a solid color first can make your face pop. Light colors like pastel pinks, blues, or creams create a soft, friendly vibe.
- Apply one or two thin coats of acrylic paint, letting each layer dry completely.
- Use a small sponge or brush for smooth coverage.
Tip: Don’t worry about imperfections—they add character and charm to handmade crafts.
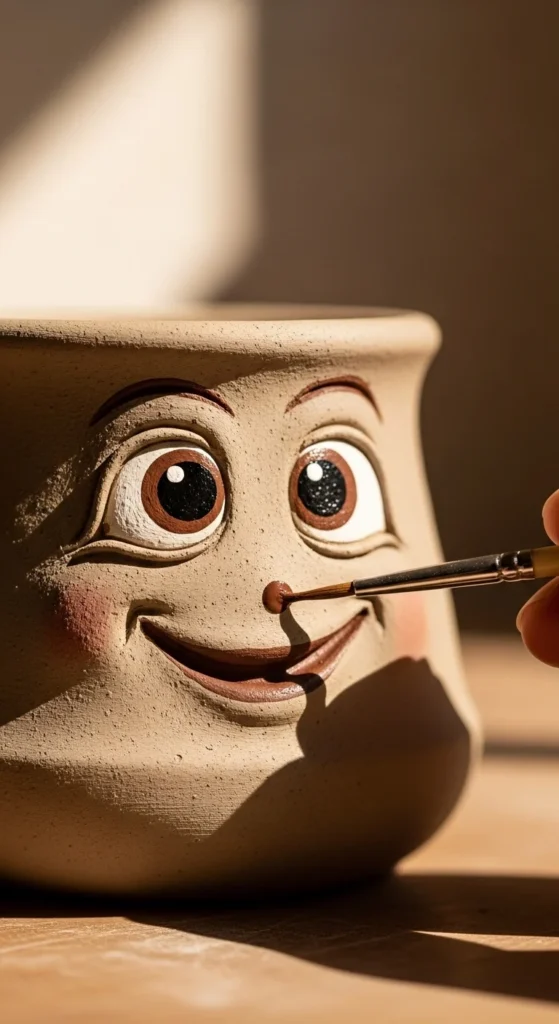
Step 3: Add the Face Details
Now comes the fun part—bringing your planter to life!
- Use fine-tipped brushes or permanent markers to draw eyes, nose, mouth, and any other features.
- Experiment with shapes: round eyes for a cute look, or squiggly lines for a playful vibe.
- Add rosy cheeks with a tiny dab of pink paint for extra charm.
Pro Tip: Let each painted feature dry before adding new details to avoid smudging.
Step 4: Seal Your Art
Once your face is complete and fully dry, it’s important to seal your design. A clear acrylic sealer protects your artwork from water damage when you pot your plants.
- Spray or brush on a thin layer of sealer.
- Allow at least an hour to dry before adding soil or plants.
Tip: Apply two light coats rather than one thick coat to prevent streaks.

Step 5: Planting Your Green Friends
Now the magic moment—bringing your planter to life with plants!
- Fill the pot with fresh potting soil.
- Gently place your plant or succulent inside.
- Add more soil around the roots and lightly press it down.
For extra personality, choose plants that mimic hair or hats:
- Succulents or small leafy plants make cute “hair.”
- Trailing plants like string-of-pearls add whimsical flair.
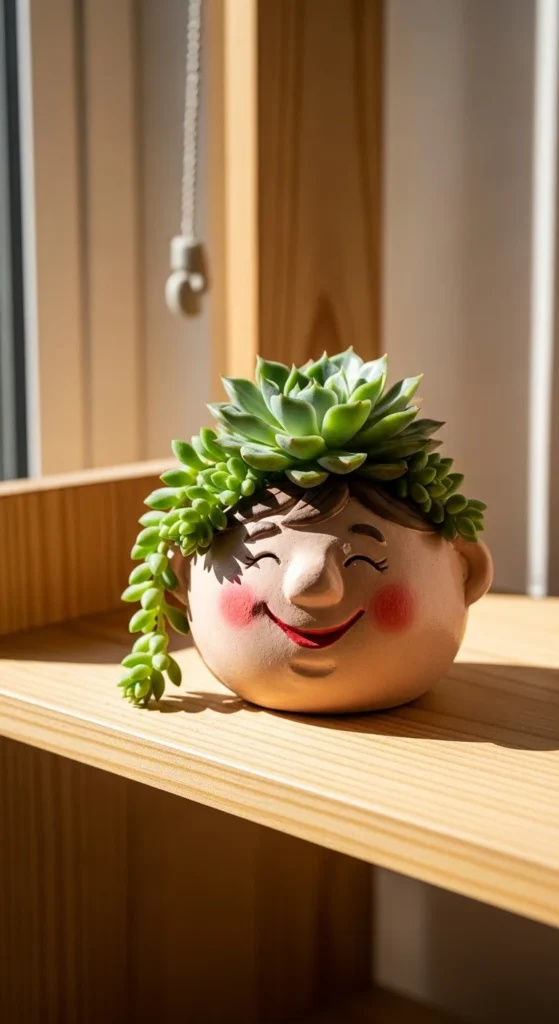
Step 6: Display and Enjoy
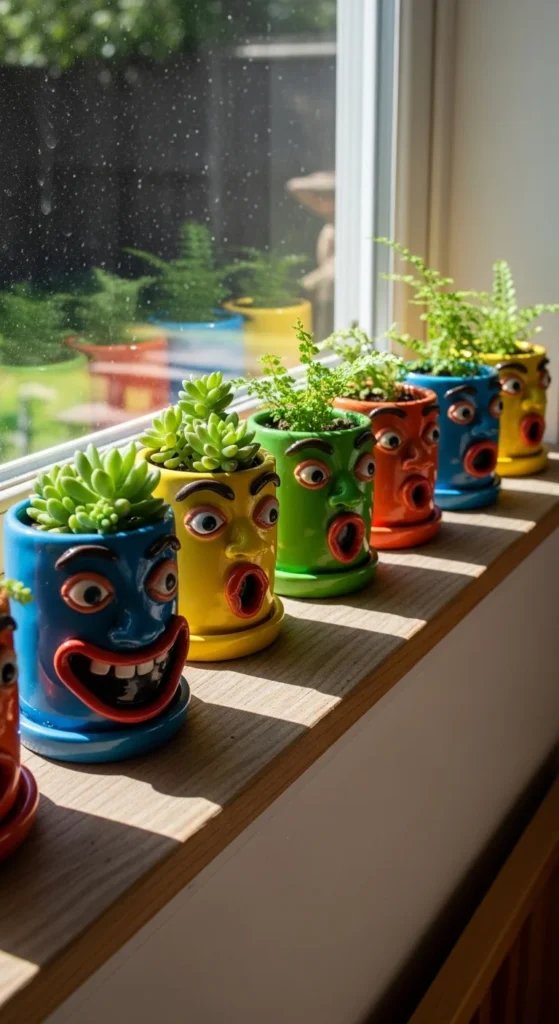
Your cute face planters are ready to brighten up any space. Arrange them on windowsills, shelves, or as a centerpiece on your table. These planters also make thoughtful, personalized gifts for friends and family.
Extra Ideas:
- Mix and match expressions for a planter “family.”
- Use metallic paints for sparkly accents.
- Turn larger pots into statement pieces with bold, fun faces.
Final Thoughts
Turning clay pots into cute face planters is more than a craft—it’s a way to add personality and charm to your home. Each pot tells its own little story, and the best part is, no two planters have to look alike.
Grab your supplies, get creative, and let your imagination run wild. Your plants—and your space—will thank you!
Save this DIY for later and start your own adorable face planter collection today.

Leave a Reply